How to Install the HUSKY Plugin
There are two ways to install the HUSKY filter plugin, depending on the source you downloaded it from:
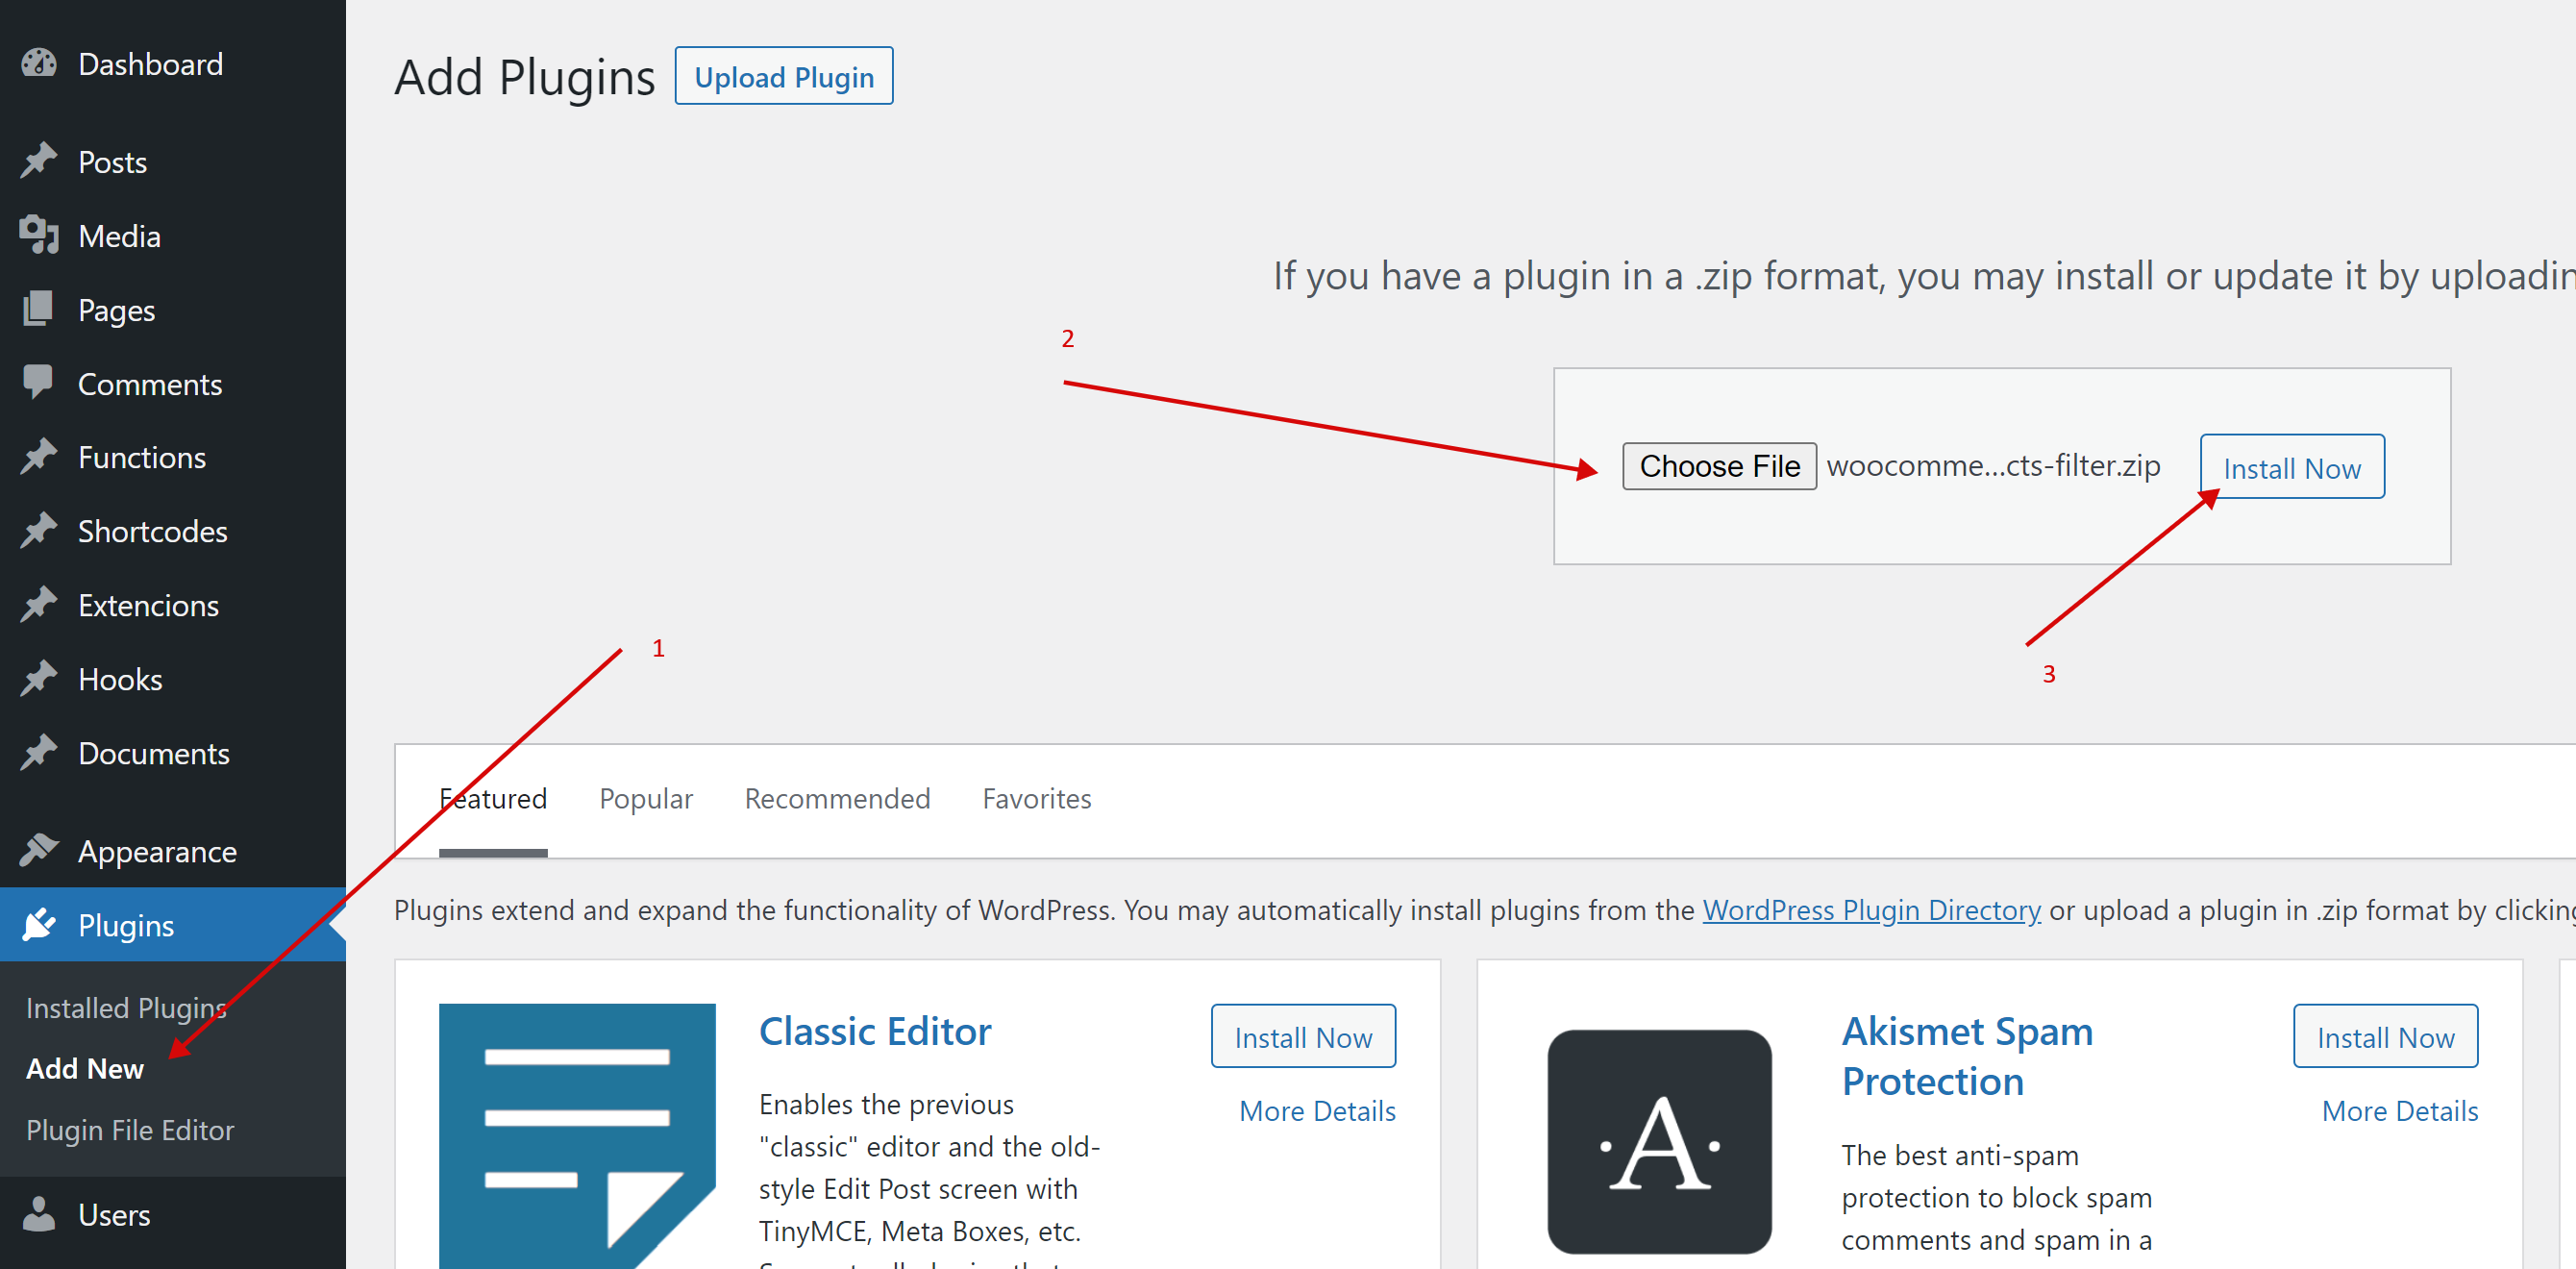
- Go to your site wp-admin part on the plugins page, click on ‘Add New‘, then click on button ‘Upload Plugin‘, select the plugin zip file, and finally click on the button ‘Install Now‘
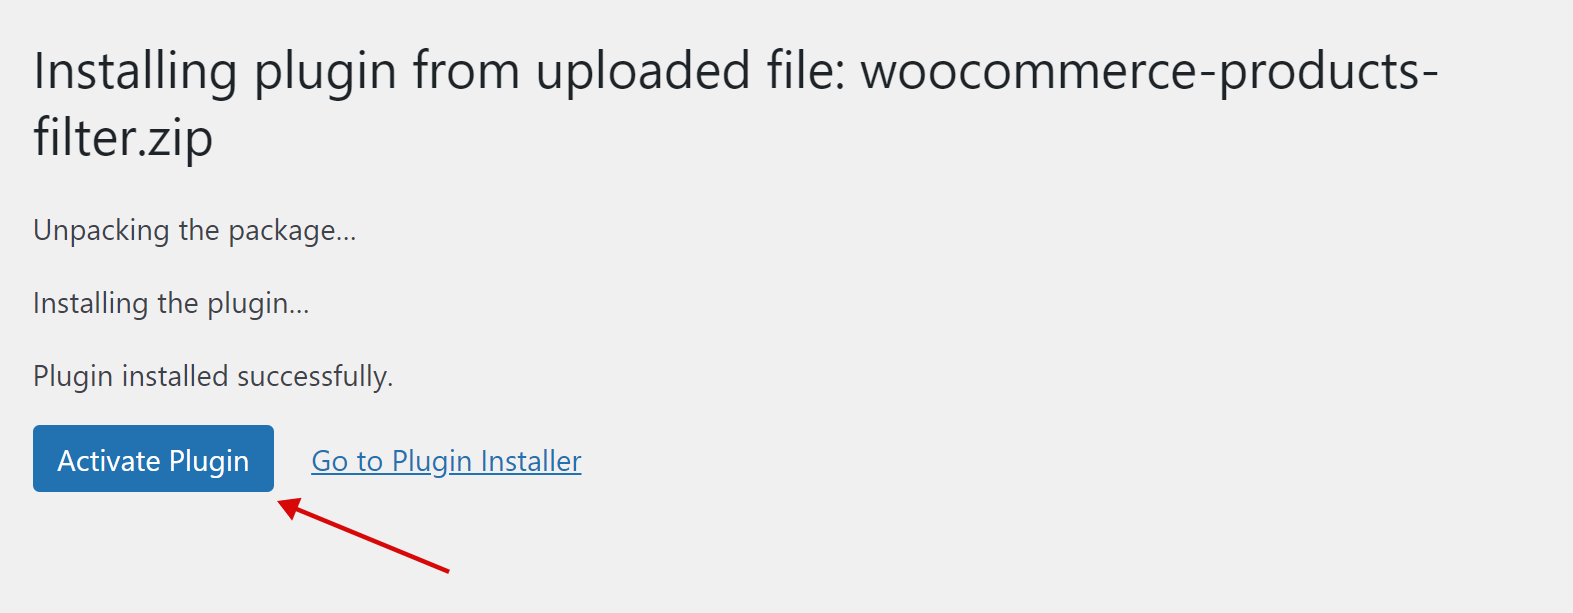
- After installation click on the button ‘Activate Plugin‘
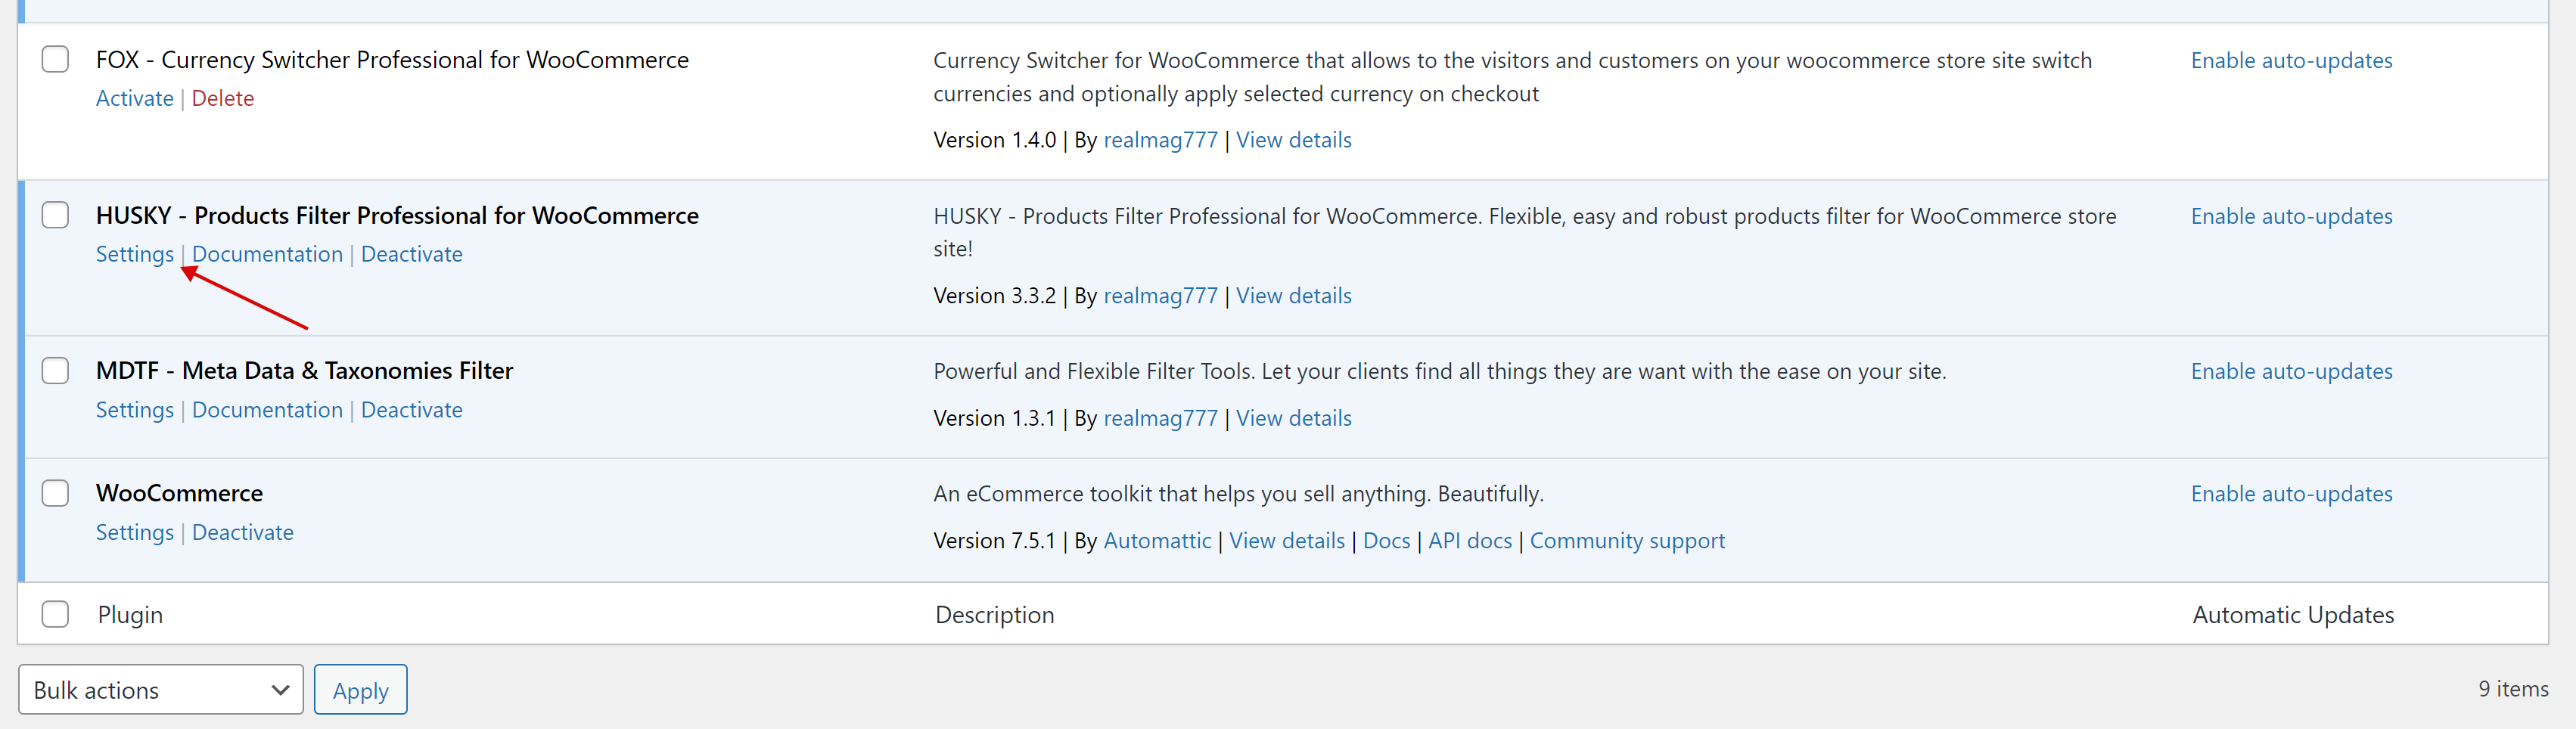
- There is 2 ways to go to the plugin settings
- On the plugin page find plugin by its name ‘HUSKY‘ and click on link ‘Settings‘
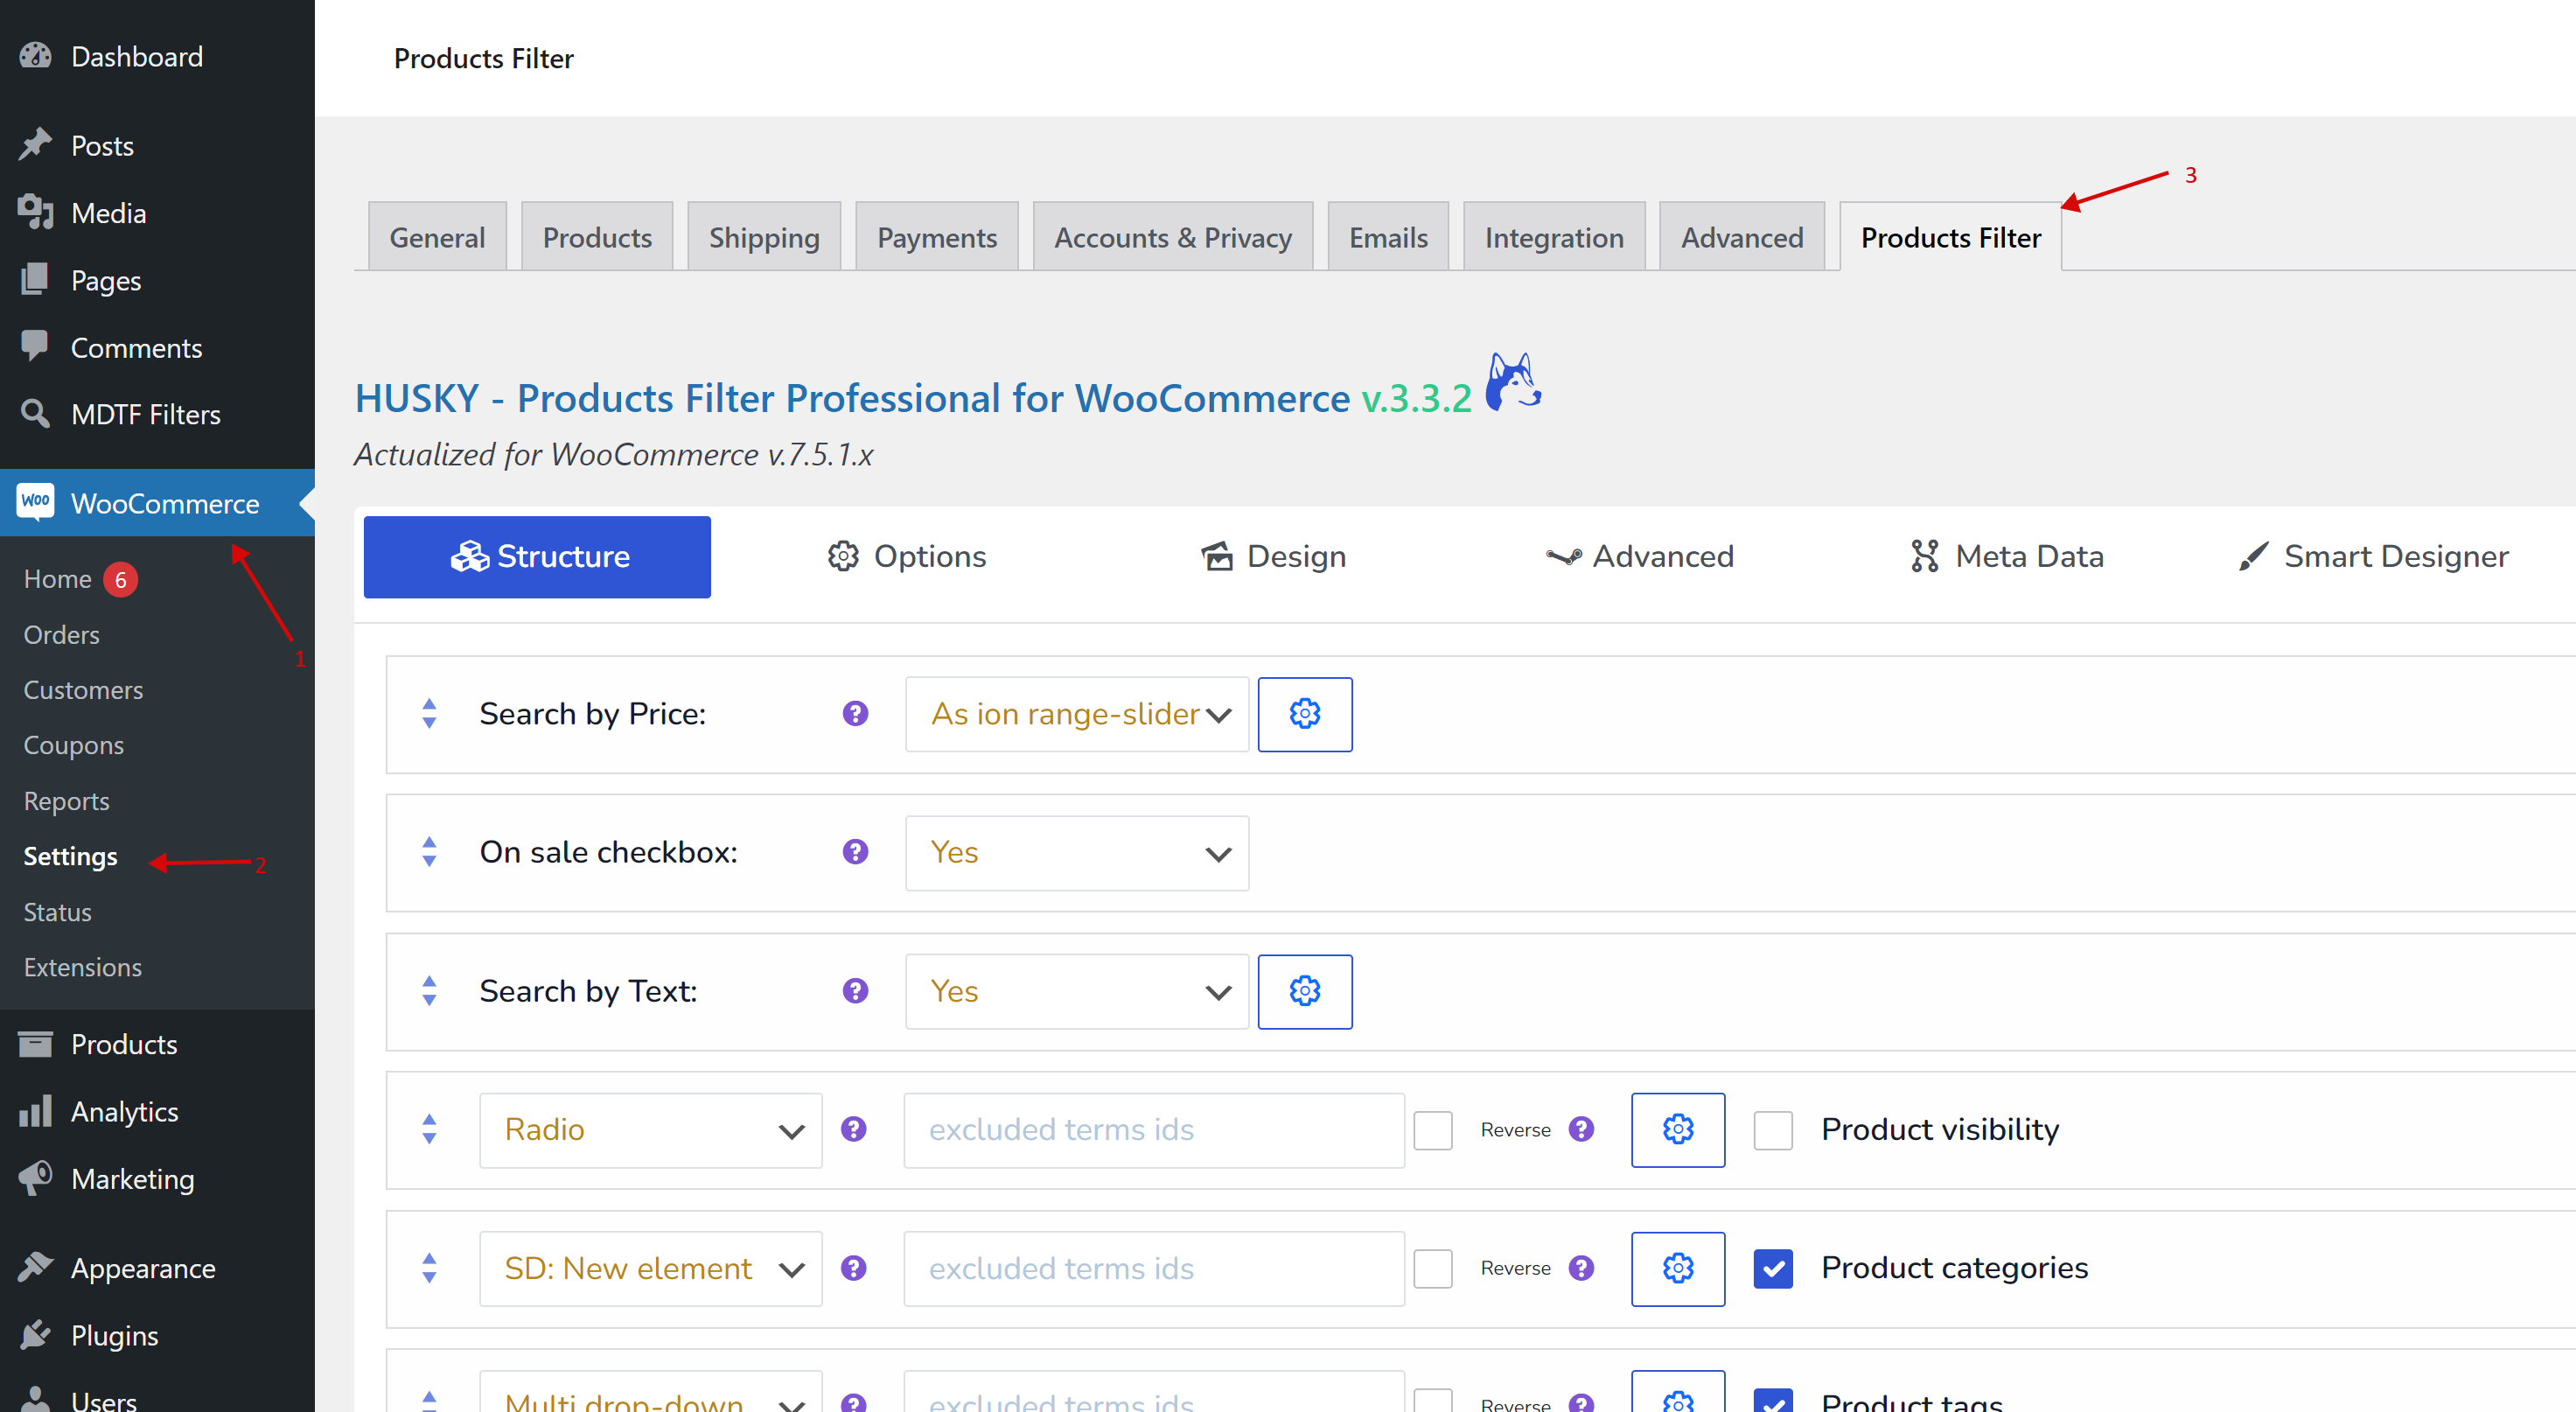
- Second way is to go to: WooCommerce -> Settings -> Product Filter
- On the plugin page find plugin by its name ‘HUSKY‘ and click on link ‘Settings‘
- The plugin is installed and ready to use
WordPress.org
- On wp-admin part of your site go to page ‘Plugins‘ and press ‘Add New‘ there
- Make search by keyword ‘husky‘
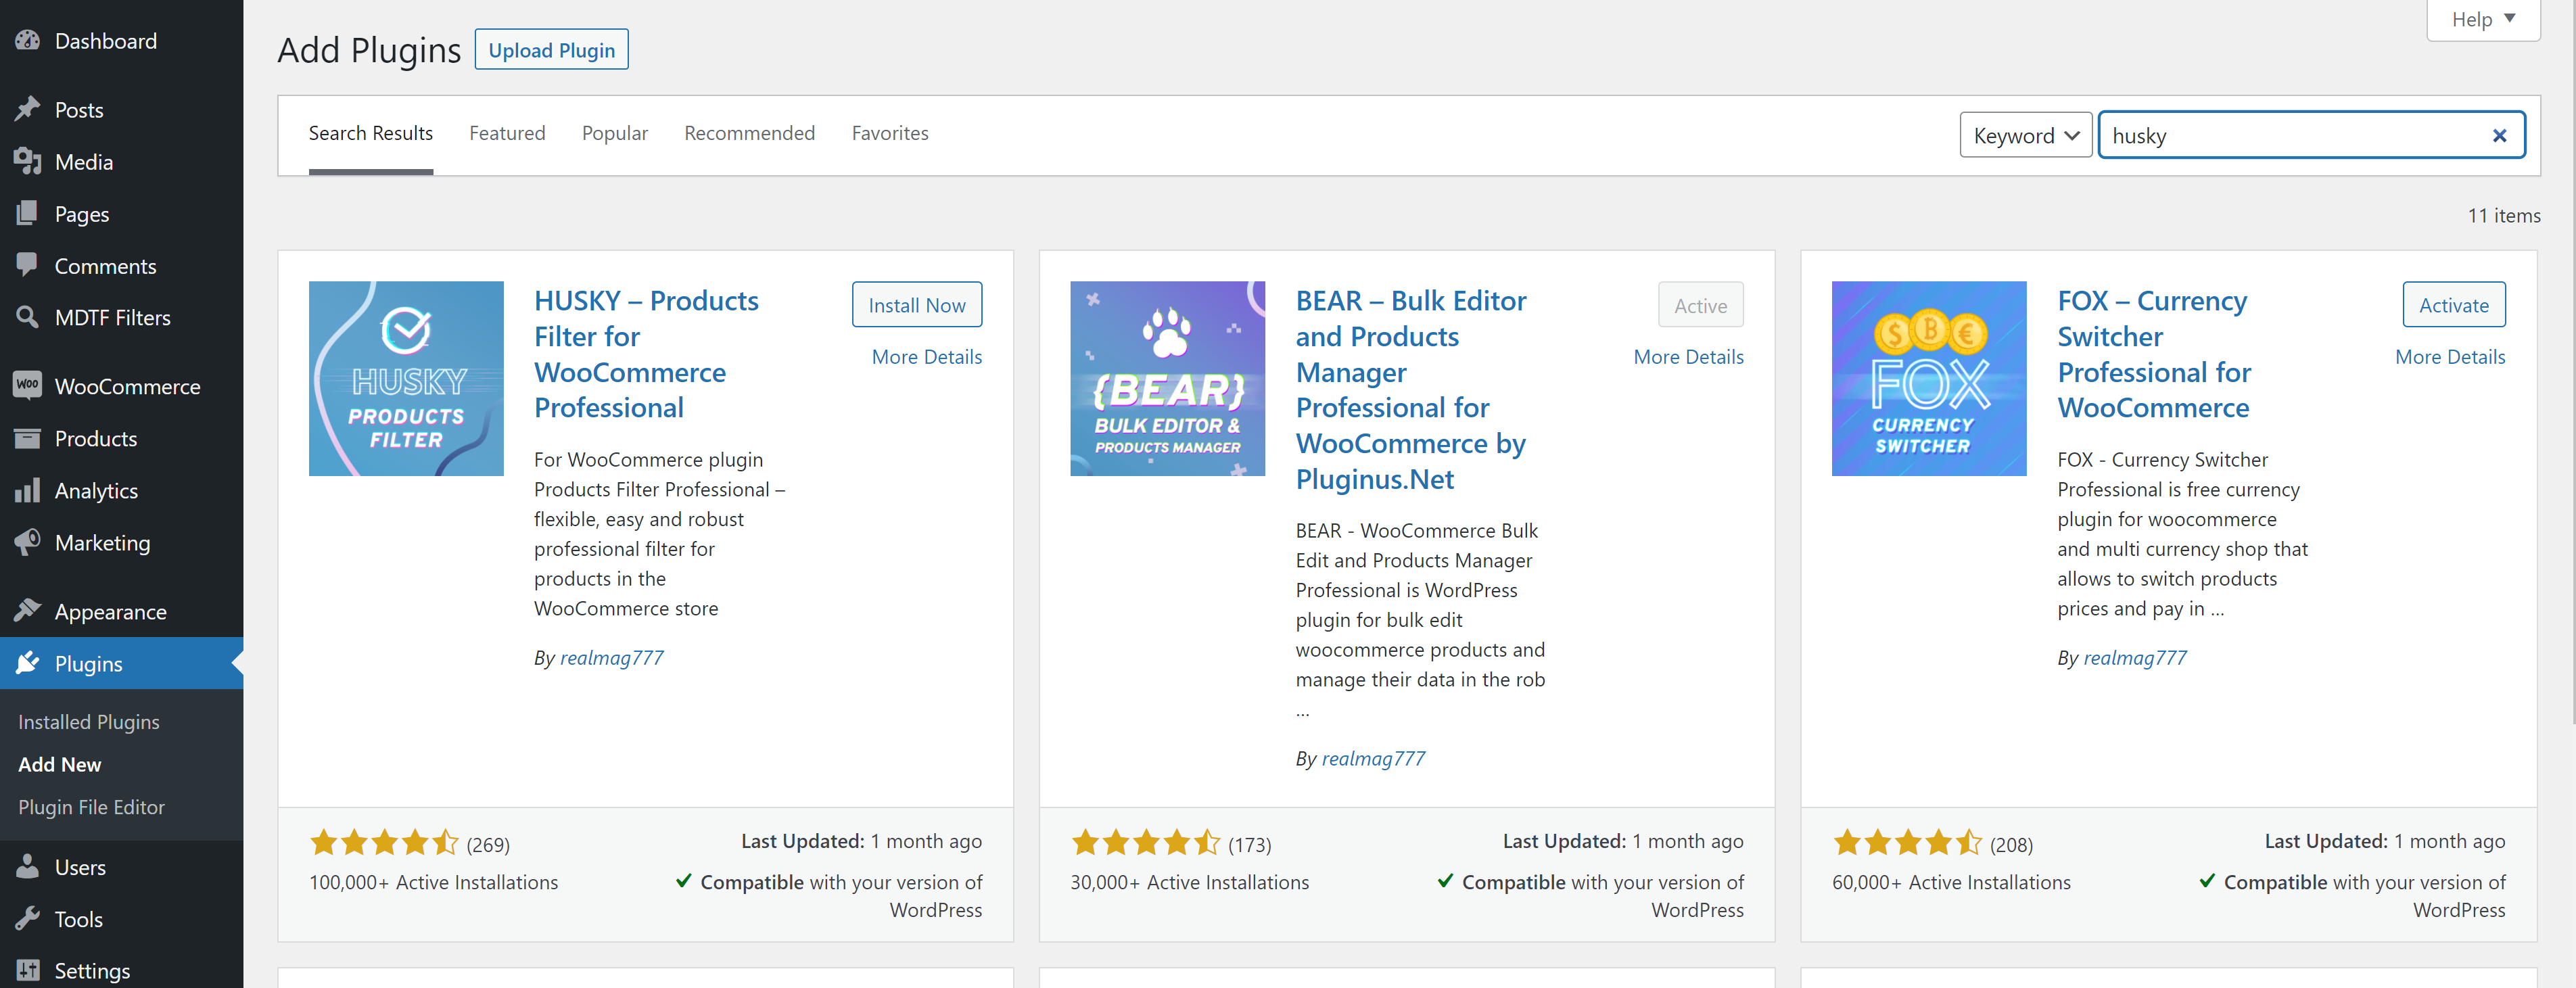
- Click on the button ‘Install Now‘
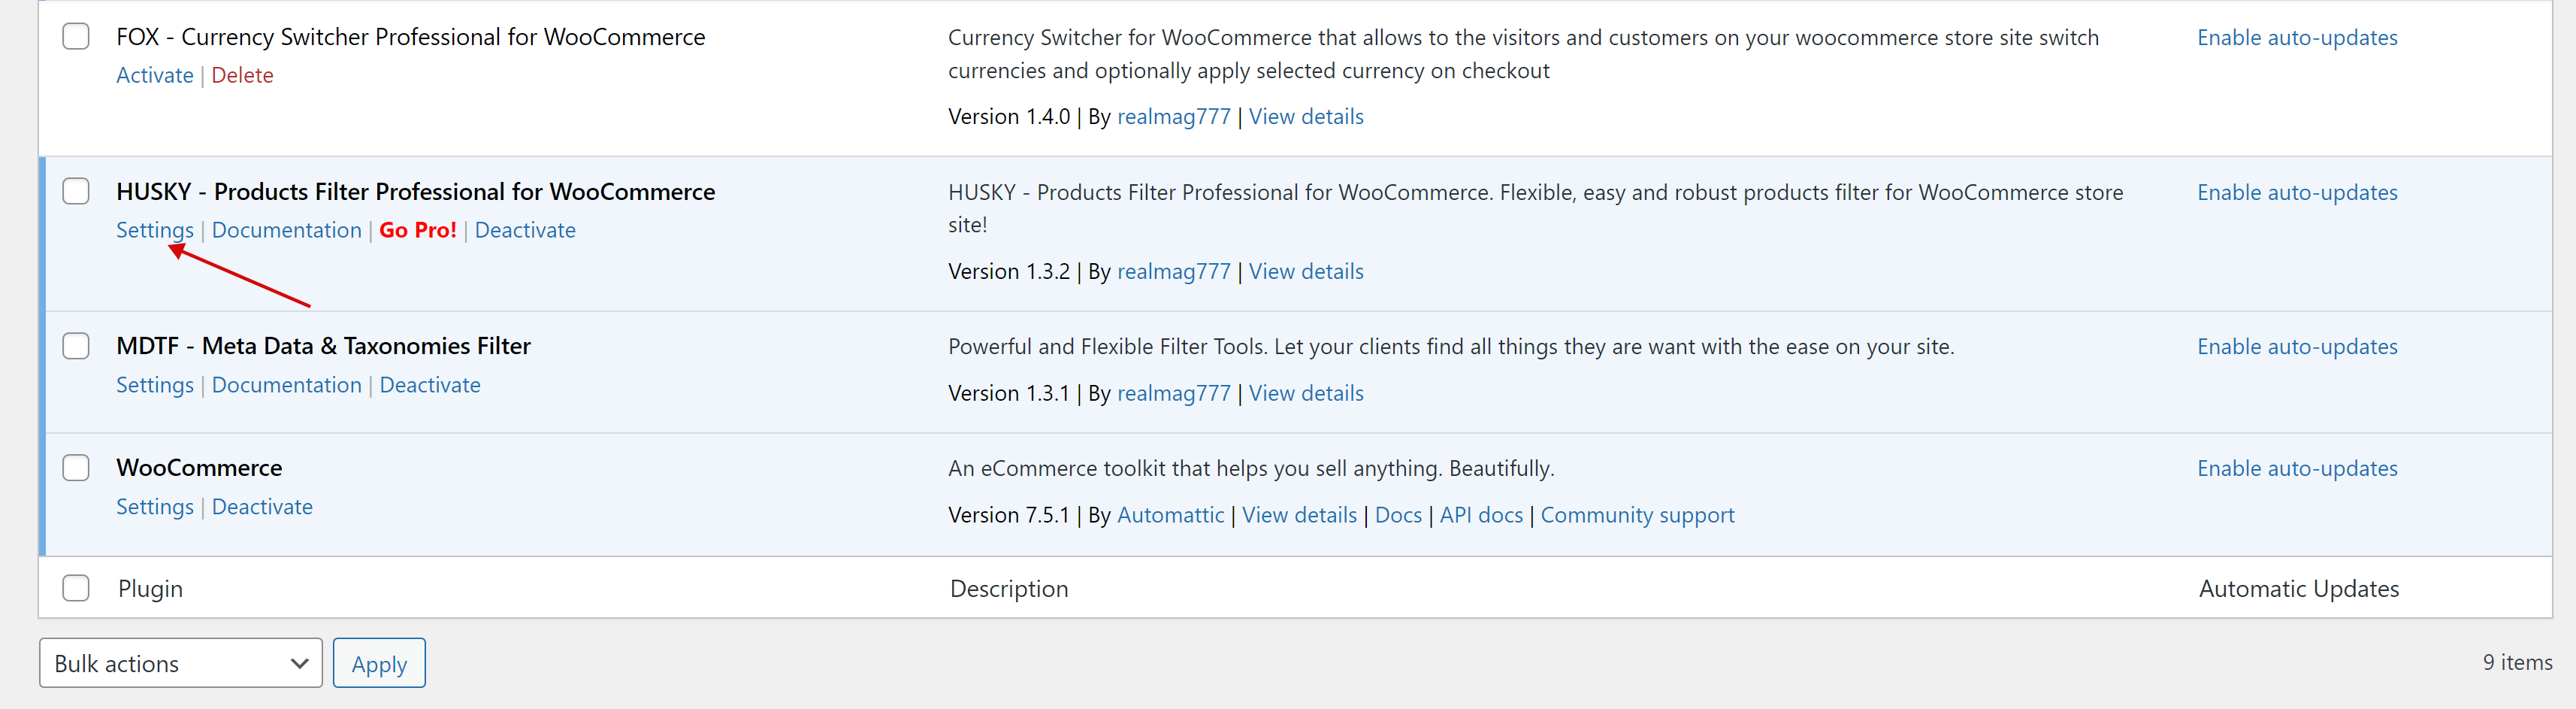
- After the plugin installation press ‘Activate‘ button
- There is 2 ways to go to the plugin settings
- On the plugin page find plugin by its name ‘HUSKY‘ and click on link ‘Settings‘
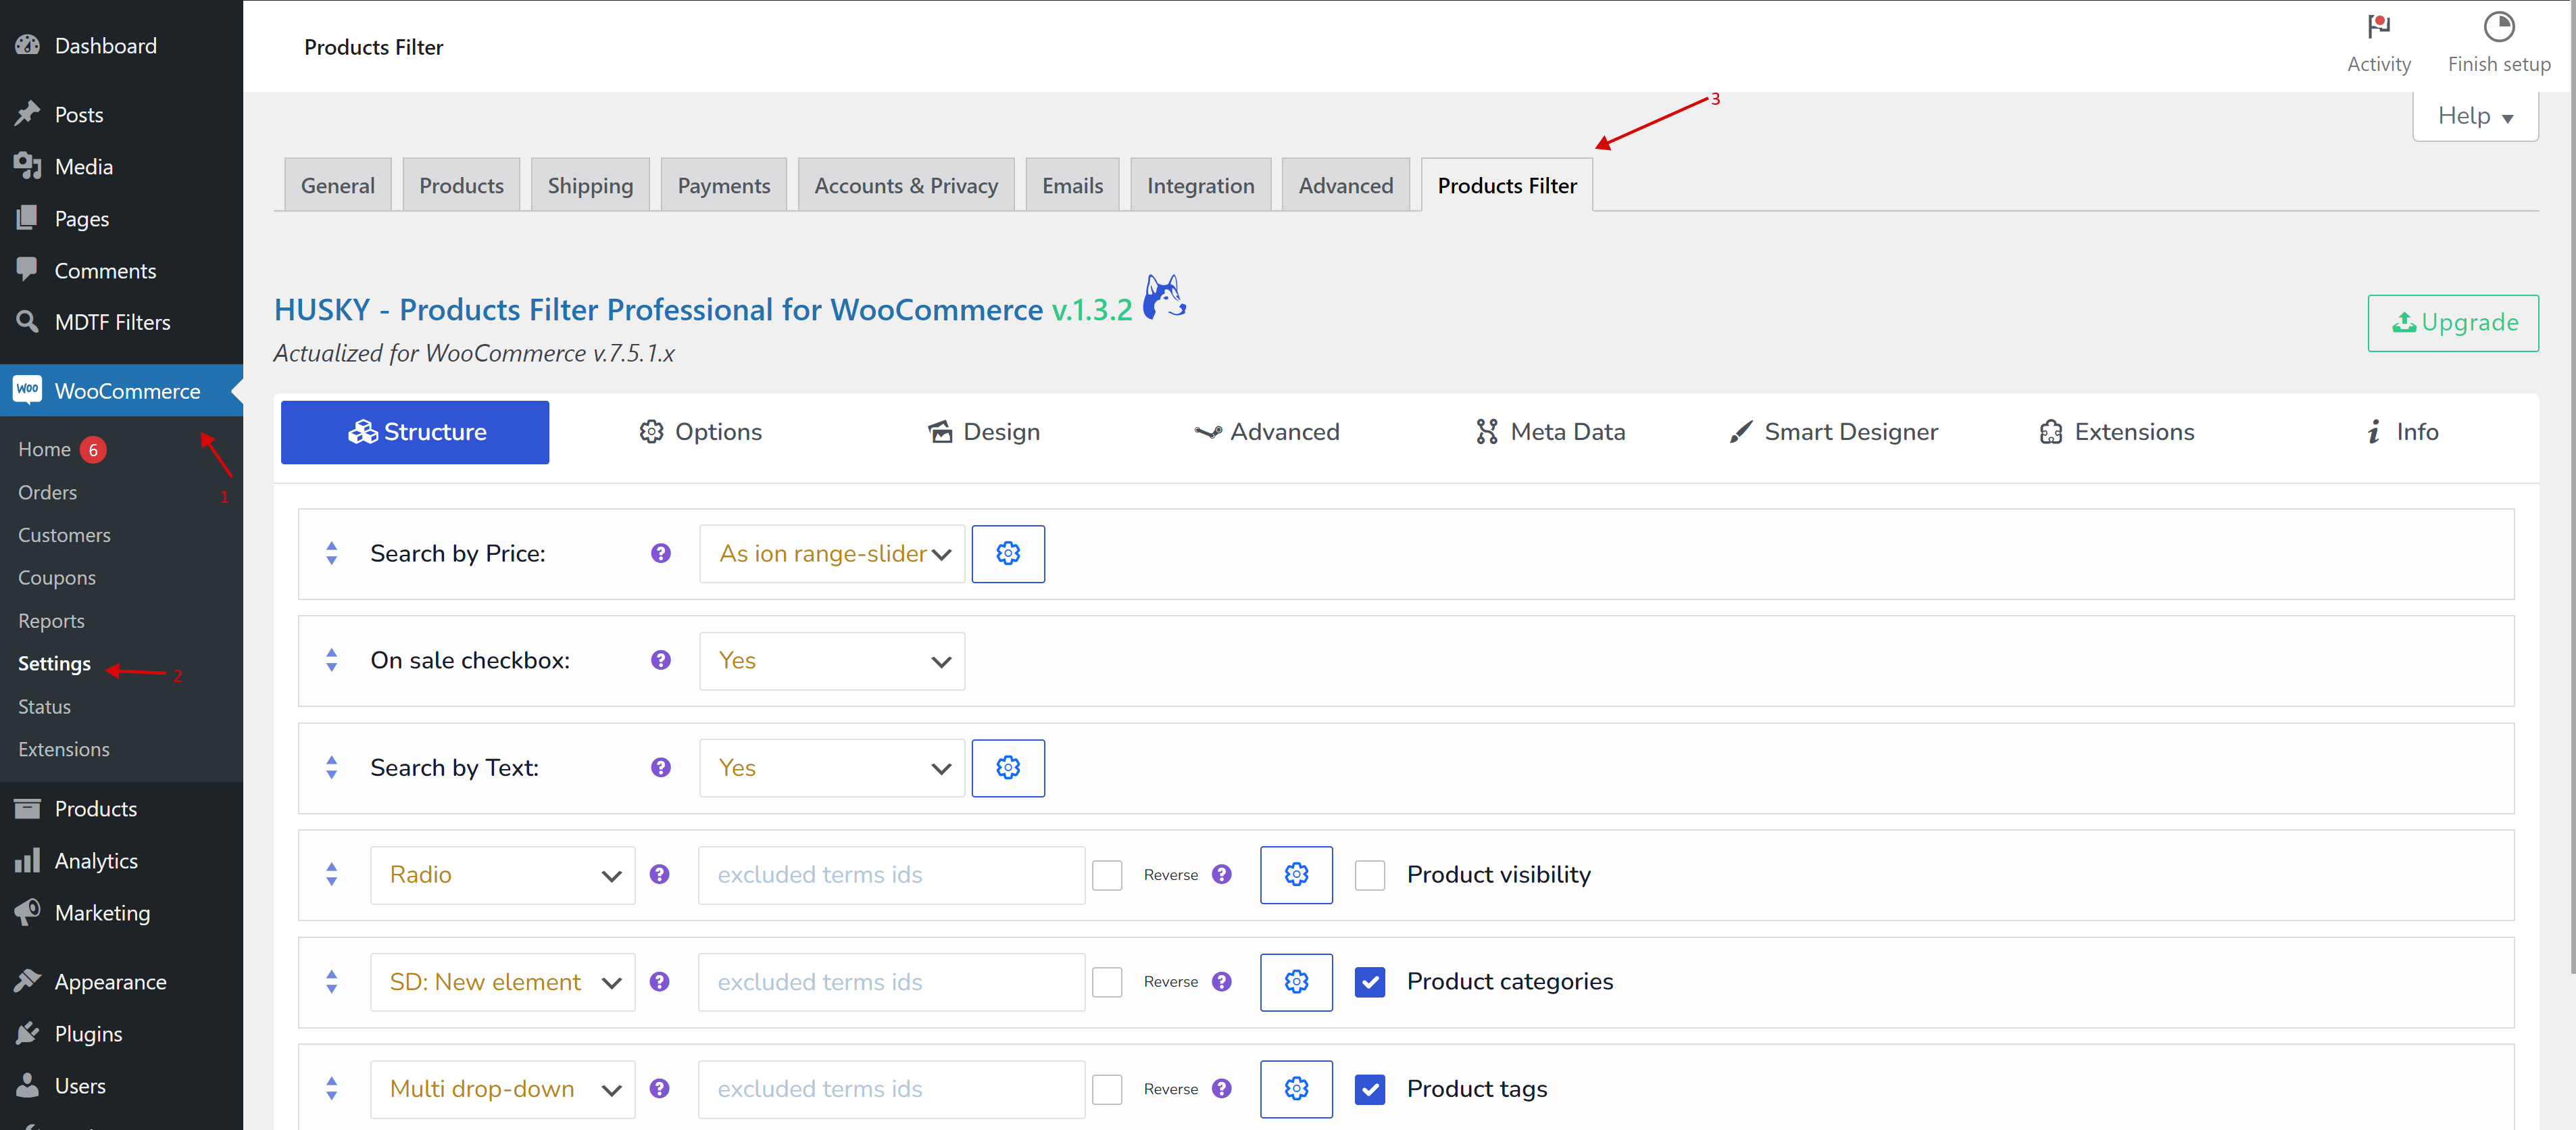
- Second way is to go to: WooCommerce -> Settings -> Product Filter
- On the plugin page find plugin by its name ‘HUSKY‘ and click on link ‘Settings‘
- The plugin is installed and ready to use